demo-attachment-116-daniel-korpai-1318728-unsplash

Check Your Artwork for Printing

Before submitting your artwork to us, please ensure that you’ve reviewed the following checklist to guarantee the highest print quality for your product.

For detailed information on each element, please refer to the relevant sections on this page.


Artwork Closure Checklist:

  1. Confirm that the final format and the number of pages align with the product ordered on our website.
  2. Verify that the artwork includes a 3mm security margin and 3mm bleed.
  3. Ensure that the artwork is set to CMYK colors.
  4. Check that elements in tones of grey are configured correctly as a scale of Black only (C, M, Y = 0%).
  5. Utilize the composite tone of black (K=100%, and C=30%) for large black areas and elements.
  6. Set fine lines (less than 2 points) and texts (less than 8 points) to only one color.
  7. Make sure to create outlines for your fonts in the artwork file
  8. Save the artwork file as PDF, including Trim marks, and maintaining the 3mm bleed.


If you’ve checked off all the elements on this BOSSPRO-X Artwork Closure Checklist, congratulations! Your artwork is ready for submission.

Get the Right Mix of Colors: CMYK

Setting Up Black Elements and Areas:

Black is a versatile color in graphic design, offering contrast, weight, and strength. However, improper settings in editing programs can lead to printing issues. To ensure optimal results, follow these guidelines:

  • For Text, Thin Lines, and Small Elements:
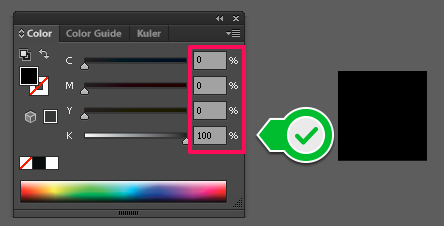
    • Use pure black by setting Black (K) to 100%.
    • Ensure Cyan (C), Magenta (M), and Yellow (Y) are set to 0%.
    • Set: B=100, C=0, M=0, Y=0 for black elements.
  • For Larger Areas and Elements:
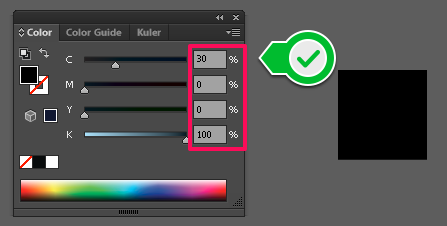
    • Use a composite black by setting Cyan (C) to 30% and Black (K) to 100%.
    • Ensure Magenta (M) and Yellow (Y) are set to 0%.
    • Set: B=100, C=30, M=0, Y=0 for larger black elements.

These instructions are applicable to various image editing programs such as Adobe Photoshop, Adobe InDesign, etc., even though the examples are shown in Adobe Illustrator. Color palettes function uniformly across different programs.

By adhering to these guidelines, you can avoid printing complications associated with black elements, ensuring a seamless and professional outcome in your design.

Save in PDF Standard

Creating a PDF File:

Before proceeding with saving your artwork as a PDF, ensure that security margins and bleed align with our specifications—maintain a 3 mm bleed and a 3 mm safety margin for a flawless outcome.


Once your file is print-ready, follow these steps:

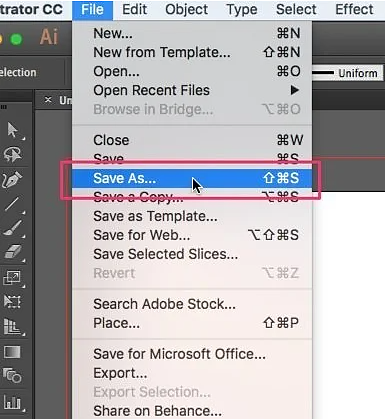
  1. Click on File → Save As in the Top Menu.

To save as PDF-X1a, click “Save As…”

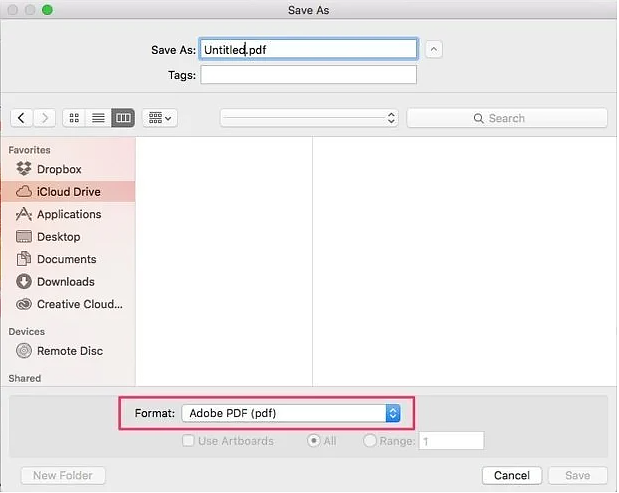
  1. Under Format, select Adobe PDF (pdf), then click “Save.” This action will open a window for PDF specifications.

Select Adobe PDF under Save As:, then save.

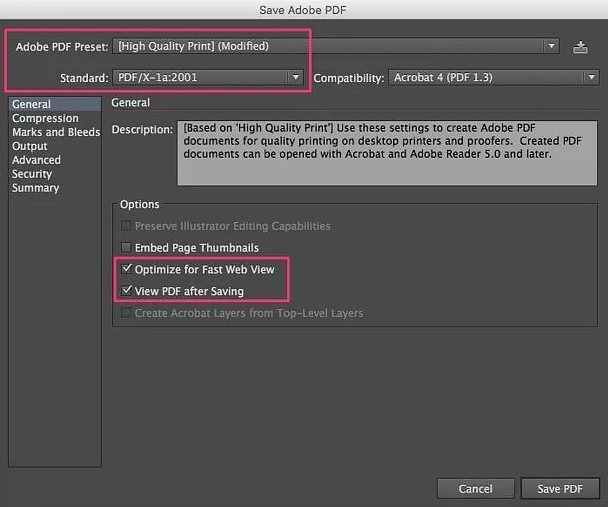
  1. In the PDF specifications window, set the Adobe PDF Preset field to “High-Quality Print.” If your Adobe Illustrator version displays only a “Custom” option, choose that and set Standard to PDF/X-1a:2001. Tick “Optimize for Fast Web View” and “View PDF” after saving in the Options panel.

Choose PDF-X1a standard and set Preset to High-Quality Print.

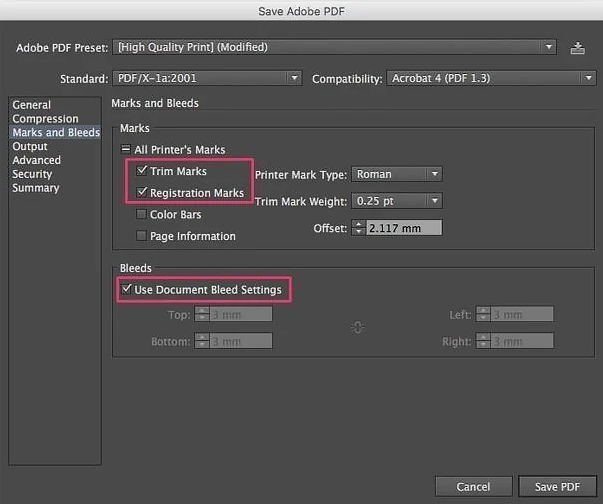
  1. Navigate to “Marks and Bleeds” on the left side. Check the boxes for “Trim Marks” and “Registration Marks” in the Marks panel to ensure precise cutting. In the Bleeds panel, tick the “Use Document Bleed Settings” option.

Set trim marks and registration marks and use document bleed settings.

  1. Double-check that all settings align with the instructions above, then click “Save PDF.”

By following these steps, you ensure your artwork is saved in the PDF standard, meeting the required specifications for optimal printing results.

Create Outline Your Fonts

Understanding Font Usage:

Fonts are collections of lettering styles that can be installed on your computer, enabling their use across various files and artworks. However, complications may arise when opening these files on different computers, especially if the fonts are not installed on the new machine. This can lead to text display and editing issues due to a lack of necessary font information.

To preemptively address these concerns, it’s crucial to convert the fonts in your artwork to curves. This tutorial guides you through the process.

Saving graphic production files as PDF negates the need for manual conversion to curves.


How to Convert Fonts to Curves:

Important Note: Before proceeding, save the original document under a different name, as the conversion process eliminates the ability to edit text.

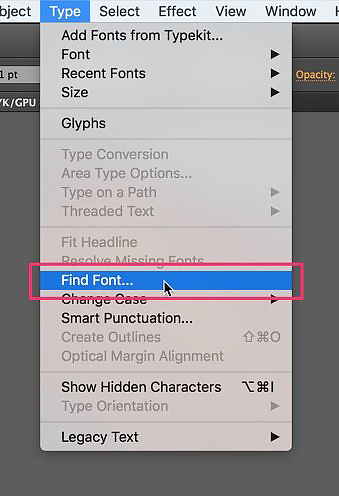
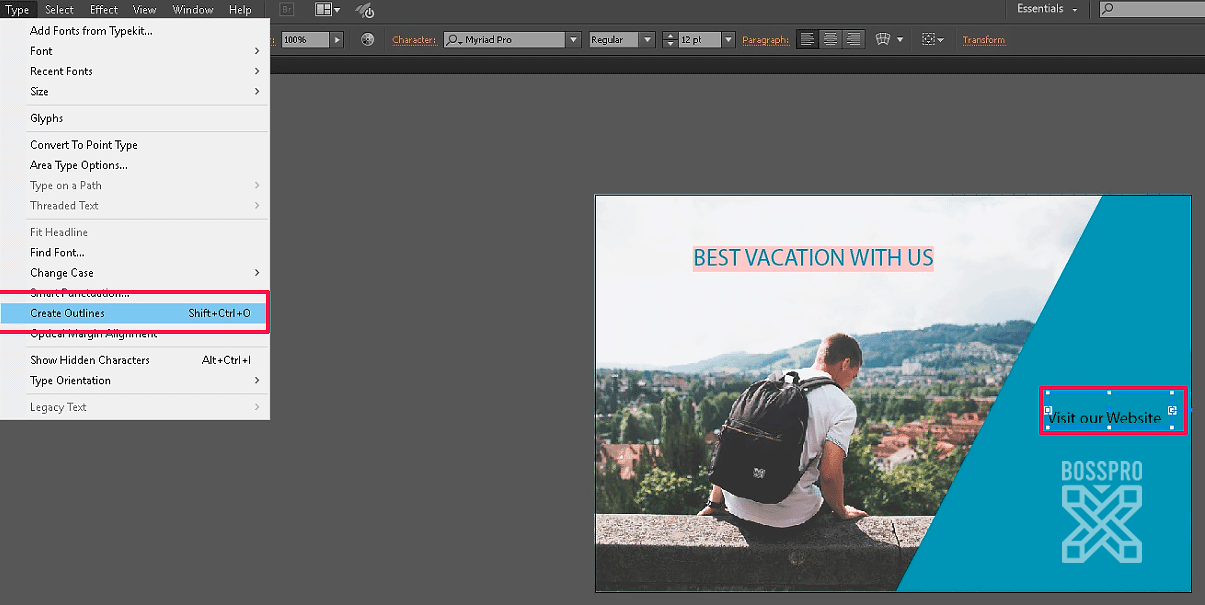
  1. Identify the fonts you want to convert to curves and locate them in the artwork using the “Find Font” tool. Click Type → Find Font in the Top Menu to list all fonts in your document.

Use the tool to locate fonts in your document.

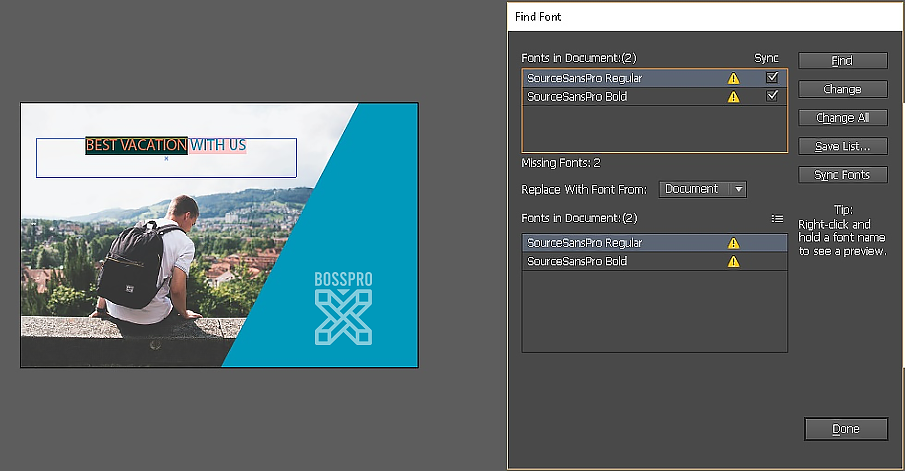
  1. Select each listed element, click “Find” for each one, and observe as they get highlighted in the artwork.

Find each font by clicking “Find.”

  1. Once you’ve identified the font locations, select them individually. To convert, go to the Top Menu and click Type → Create Outlines.

Select each font and click “Create Outlines.”

This process transforms your fonts into curves, ensuring consistent appearance across different computers. With just a few clicks, you achieve perfect compatibility for all fonts in your document.

Note: Converting fonts to curves will restrict further text editing.

Use CMYK Mode for Printing

For optimal results, it’s recommended to set your document to CMYK color mode right from the beginning of your file creation. If you haven’t done so yet, follow this quick tutorial to make the switch.

In our offset printing process, we exclusively utilize CMYK, a color model incorporating Cyan, Magenta, Yellow, and Black for all color representations.


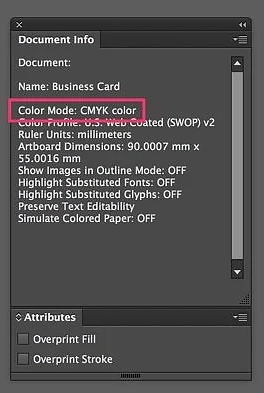
To confirm your document’s color mode, navigate to Window → Document Info, where you can verify its current setting.

Open Document Info to confirm CMYK color mode.

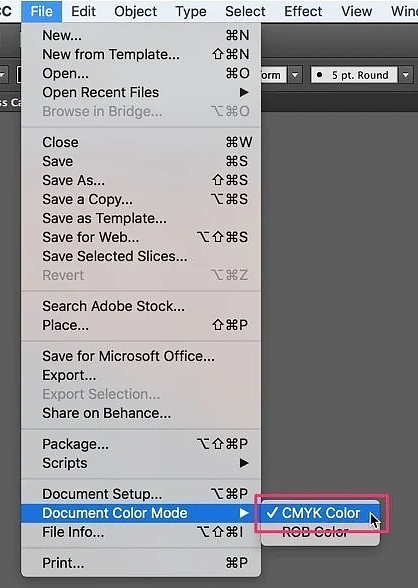
If the document is not in CMYK mode, go to File → Document Colour Mode → CMYK Color to make the necessary adjustment.

Set Document Colour Mode to CMYK Color if needed.

demo-attachment-117-julian-o-hayon-237297-unsplash

Set Up 5mm Safety Margin: Artwork Files for Folds

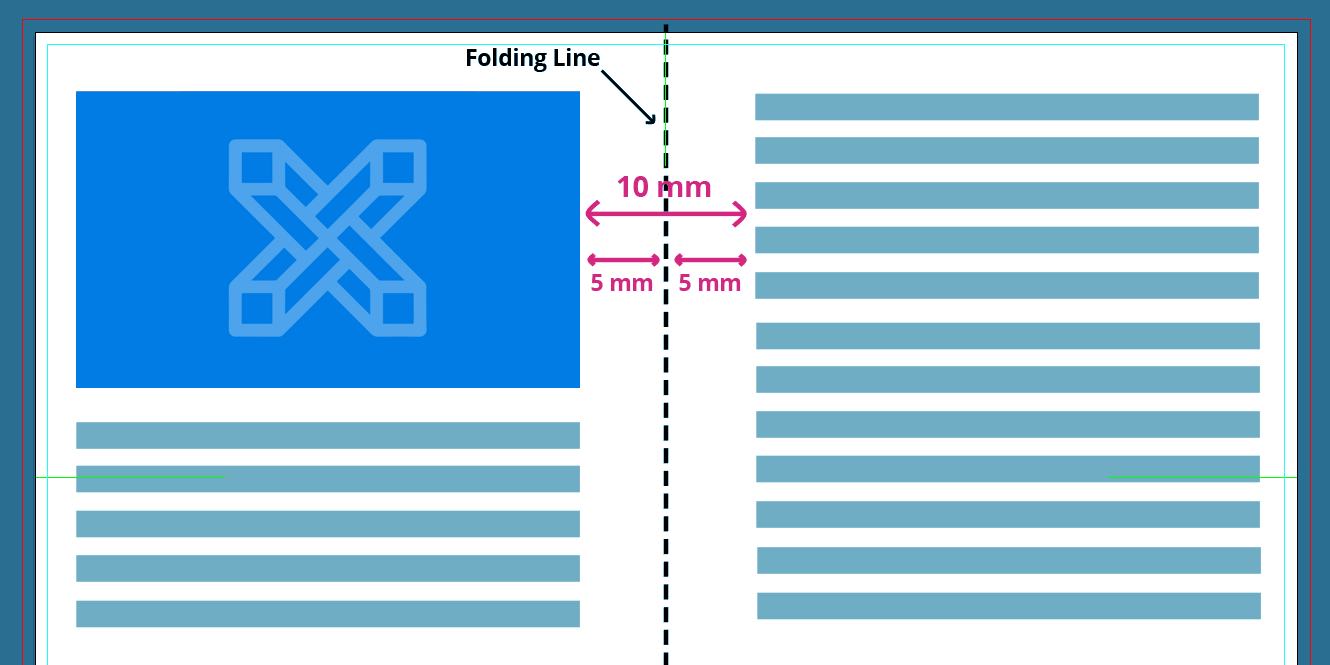
When creating an artwork file that involves folds, it’s crucial to consider the required safety margins on each side of the folding lines. Due to the mechanical nature of folding machines, the actual folding line on the final product may deviate up to 2 or 3 mm on each side. Without a safety margin, the fold could intersect with text, images, or other content.

We strongly recommend leaving a margin of 5mm on each side of the folding line to ensure 100% safety for your content.

Key Points:

  • Include a safety margin of 5mm on each side of the folding line.

In summary, to receive your printed product in its intended form, free from errors or deviations from the original design, it is imperative to incorporate a safety margin on each side of the folding line.

If you have any questions after reviewing the help section or need assistance in determining a suitable safety margin, feel free to contact us anytime.

demo-attachment-118-evgen-kuhto-1304030-unsplash

Add Bleed and Margins to Your Artwork

To ensure optimal printing results, it’s crucial to set up your files with a 3mm bleed and a 3mm safety margin. This is essential because during the cutting process, there’s a possibility of cutting slightly too far in (hence the need for a safety margin) or too far out (which is why bleed is necessary). The safety margin ensures that no vital content is unintentionally cut, while the bleed guarantees there’s no white border at the product’s edge.


Setting Up Bleed:

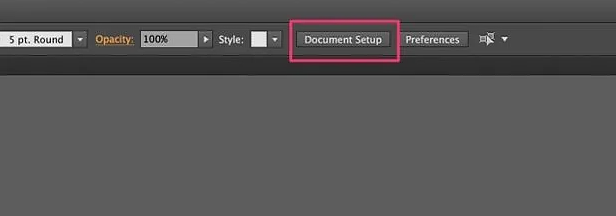
  • Open your file and click on “Document Setup.”
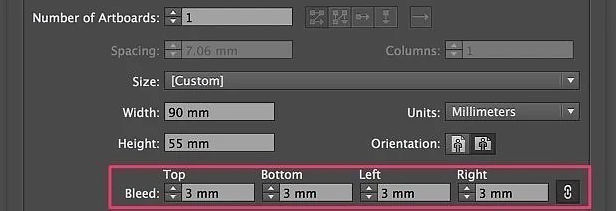
  • In the Document Setup window, set the bleed to 3mm on all sides of the artwork.
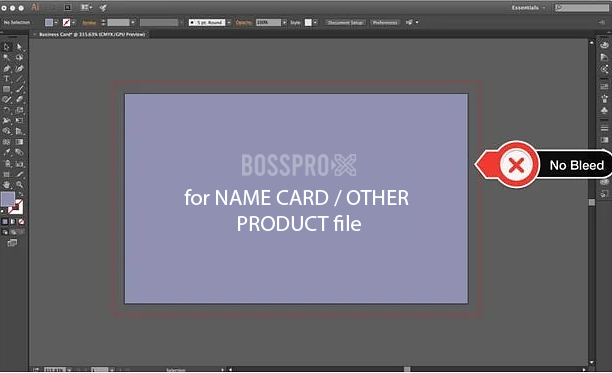
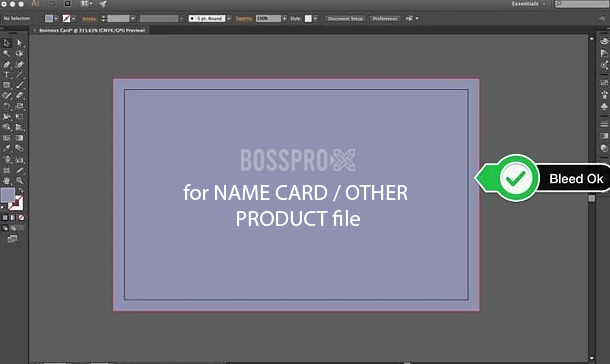
  • After clicking “Ok,” a red border around the artboard indicates the necessary bleed of 3mm for your graphical elements.

Without bleed, important information can get cut off. With bleed, all information in your file is safe.

Setting Up Safety Margins:

Note: Safety margins are not supported by default in Adobe Illustrator. Follow these steps:

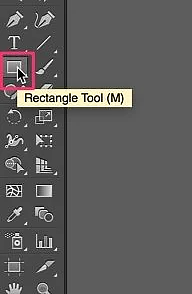
  • Select the Rectangle Tool and create a rectangle by clicking anywhere on the screen.
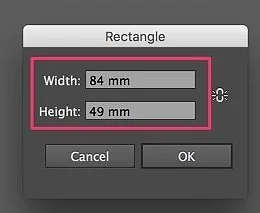
  • In the rectangle dimensions window, input dimensions 6mm less in width and 6mm less in height than your artwork (e.g., for 90mm x 55mm business cards, set the rectangle size to 84mm x 49mm).
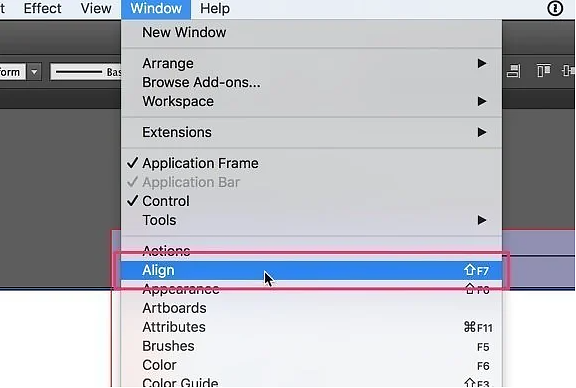
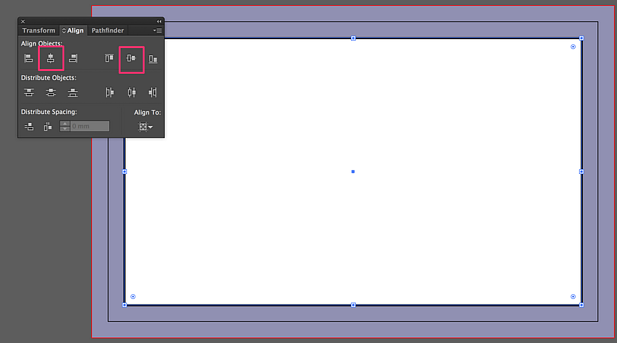
  • Click “OK” to create the rectangle and center it on the artboard using the Window -> Align menu.
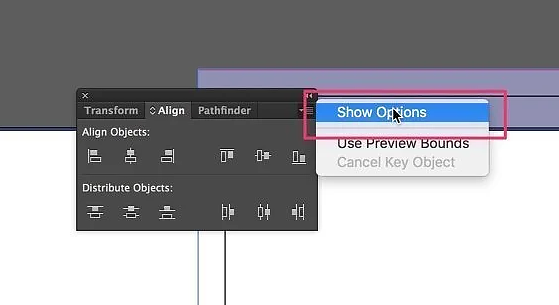
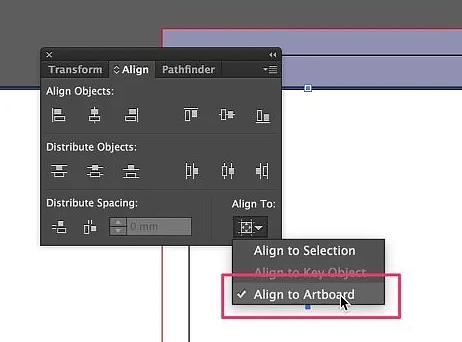
  • In the Align window, click “More Options,” select “Show Options,”
  • and choose “Align to Artboard.”
  • Align the rectangle to the center of the artboard by clicking “Horizontal Align Center” and “Vertical Align Center.”
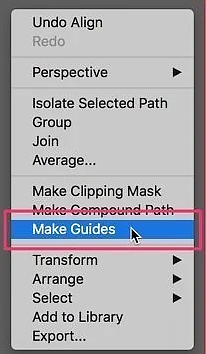
  • While the rectangle is selected, right-click anywhere, and choose ‘Make Guides.’

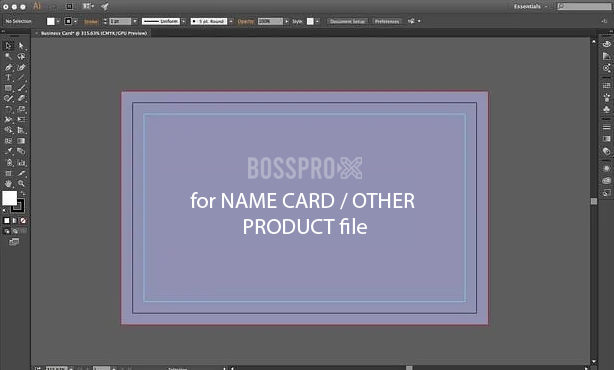
Your bleed and safety margins are now properly set. Ensure all graphic elements extend to the red border, avoiding any crucial information between the red and turquoise borders, as this may be lost during the cutting process.

You are now ready to proceed.

Subscribe to our BOSSPRO-X newsletter for more helpful tips and updates!