Understanding Font Usage:
Fonts are collections of lettering styles that can be installed on your computer, enabling their use across various files and artworks. However, complications may arise when opening these files on different computers, especially if the fonts are not installed on the new machine. This can lead to text display and editing issues due to a lack of necessary font information.
To preemptively address these concerns, it’s crucial to convert the fonts in your artwork to curves. This tutorial guides you through the process.
Saving graphic production files as PDF negates the need for manual conversion to curves.
How to Convert Fonts to Curves:
Important Note: Before proceeding, save the original document under a different name, as the conversion process eliminates the ability to edit text.
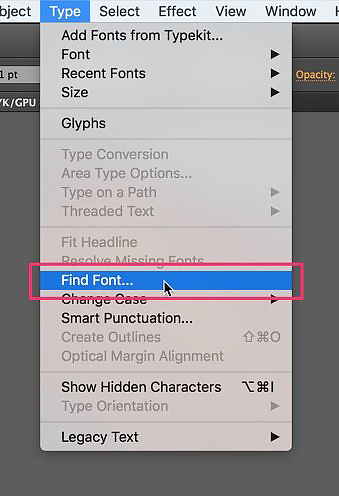
- Identify the fonts you want to convert to curves and locate them in the artwork using the “Find Font” tool. Click Type → Find Font in the Top Menu to list all fonts in your document.

Use the tool to locate fonts in your document.
- Select each listed element, click “Find” for each one, and observe as they get highlighted in the artwork.

Find each font by clicking “Find.”
- Once you’ve identified the font locations, select them individually. To convert, go to the Top Menu and click Type → Create Outlines.

Select each font and click “Create Outlines.”
This process transforms your fonts into curves, ensuring consistent appearance across different computers. With just a few clicks, you achieve perfect compatibility for all fonts in your document.
Note: Converting fonts to curves will restrict further text editing.
 Cart is empty
Leave A Comment