Creating a PDF File:
Before proceeding with saving your artwork as a PDF, ensure that security margins and bleed align with our specifications—maintain a 3 mm bleed and a 3 mm safety margin for a flawless outcome.
Once your file is print-ready, follow these steps:
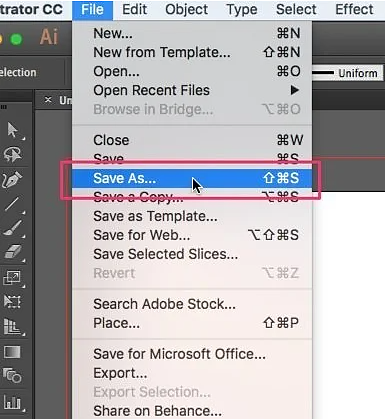
- Click on File → Save As in the Top Menu.

To save as PDF-X1a, click “Save As…”
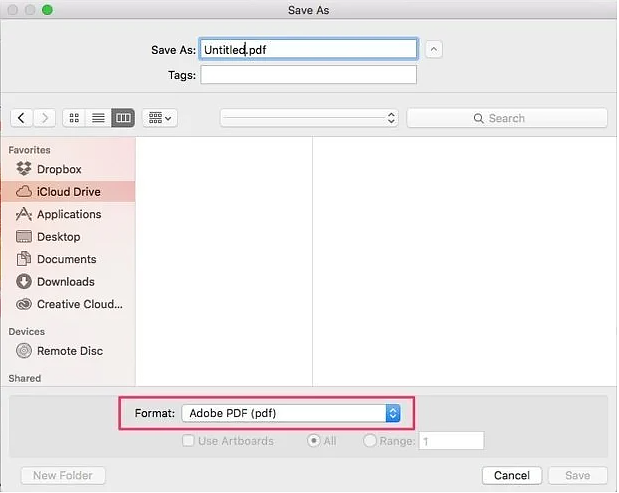
- Under Format, select Adobe PDF (pdf), then click “Save.” This action will open a window for PDF specifications.

Select Adobe PDF under Save As:, then save.
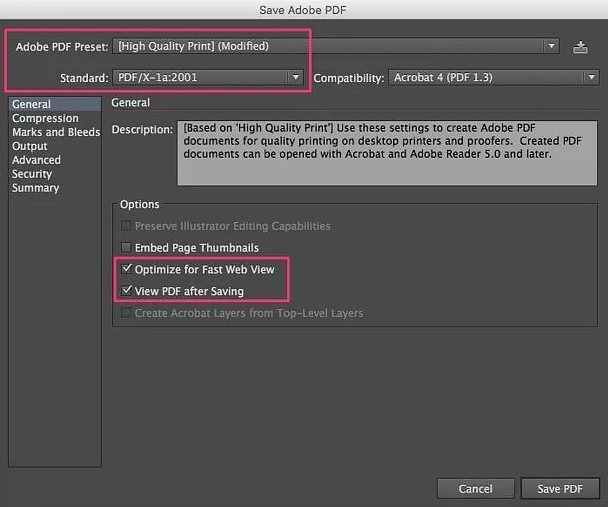
- In the PDF specifications window, set the Adobe PDF Preset field to “High-Quality Print.” If your Adobe Illustrator version displays only a “Custom” option, choose that and set Standard to PDF/X-1a:2001. Tick “Optimize for Fast Web View” and “View PDF” after saving in the Options panel.

Choose PDF-X1a standard and set Preset to High-Quality Print.
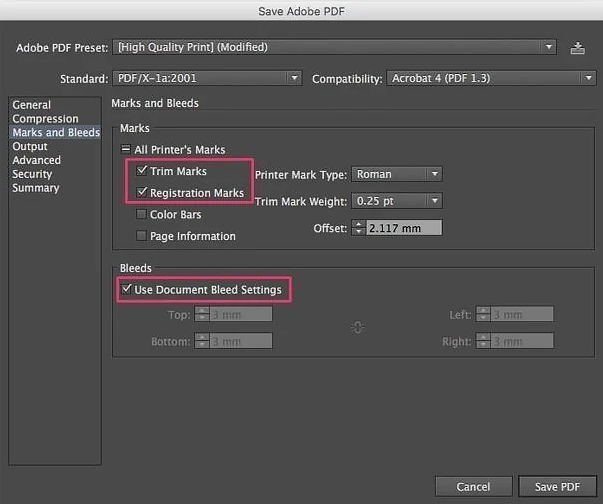
- Navigate to “Marks and Bleeds” on the left side. Check the boxes for “Trim Marks” and “Registration Marks” in the Marks panel to ensure precise cutting. In the Bleeds panel, tick the “Use Document Bleed Settings” option.

Set trim marks and registration marks and use document bleed settings.
- Double-check that all settings align with the instructions above, then click “Save PDF.”
By following these steps, you ensure your artwork is saved in the PDF standard, meeting the required specifications for optimal printing results.
 Cart is empty
Leave A Comment